Good morning,
By default, Windows does not allow connection to an L2TP/IPsec VPN server located behind a NAT device. To bypass this block, it is necessary to apply a modification to the system registry.
__Apply change to registry*
- Press the Windows + R keys at the same time to bring up the Launch dialog.
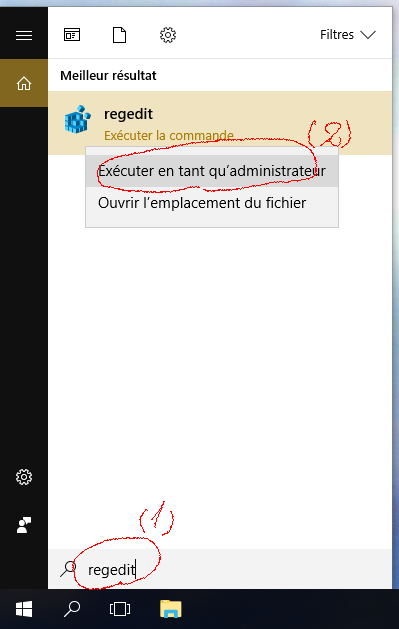
- In the field, type regedit then click **OK__.
- If a User Account Control* window appears, click **YES.
- In the left pane, locate and click the HKEY_LOCAL_MACHINE\YSTEM\urrentControlSet\ervices\olicyAgent folder
- Click on the menu Edit > New > DWORD 32 bit
- Rename the entry New value #1 which has just been created by AssumeUDPEncapsulationContextOnSendRule and validate by pressing the ENTER key
- Right-click the AssumeUDPEncapsulationContextOnSendRule entry, and then click Edit
- In the Data Value field, indicate 2 and validate by clicking OK.
- Restart your computer.
__Configure connection to VPN server*
- Click the __Start* button (Windows icon)
- Click *Settings__
- Click on __Network & Internet*
- Select __VPN*
- Click **Add VPN connection__
- Fill in the field with the following values:
- VPN provider: Windows (built-in)
- Connection name: as desired (e.g. Home)
- Server name or address: ***.internet-box.ch (see attached image, no. 1)
*Virtual Private Network Type: *L2TP/IPsec with pre-shared key__ - Pre-shared key: as indicated on your configuration page (see attached image, no. 2)
- Username: your username as indicated on the VPN configuration page (see attached image, no. 3)
- Password: your password as indicated on the VPN configuration page (see attached image, no. 4)
- Remember my connection information: **check the box__

Good to know
You will probably not be able to connect to the VPN if you are connected to the same network as your VPN server (as your internet box). So test the connection on the go or using a mobile phone that supports tethering.
Good evening.
Hello everyone,
Try again by observing the following points,
1.) “Run as administrator” regedit, even if you are the only user of your Windows system.
When you modify the registry with the “Registry Editor” according to the advice of @nicomarin and that of @JQ89 ([here](https://community.swisscom.ch/t5/Discussions- on-routers/VPN-on-BOX-internet/m-p/409782#M1296 “VPN on BOX internet")) (Thanks to them for these excellent Tutorials!),
- Run it by clicking the right button, then use “Run as administrator”.

Good morning,
For me it was the old method proposed for Windows OS that worked: [https://www.swisscom.ch/en/residential/help/internet/vpn-server.html](https://www. swisscom.ch/en/residential/help/internet/vpn-server.html)
The procedure can be found in “windows operating systems guide”
- Solutionselected by ZoéC
THANKS!
I also found and the answer was simple and did not require any misinterpretation of the role of a DNS server or the modification of registry keys (ref to the answers of tn and nicomarin)….
Simply go to the connection properties and check the boxes “allow the following protocols” and “CHAP protocol”…
There you go, hope this helps the next ones.

